Why DIY Kitchen Decor is Trending
DIY kitchen decor has exploded in popularity, and it’s easy to see why. With the rise of platforms like Pinterest, homeowners are constantly seeking fresh, personalized, and cost-effective ways to transform their spaces. The DIY approach allows for complete creative control, enabling you to design a kitchen that perfectly reflects your style and meets your functional needs. The satisfaction of creating something with your own hands, coupled with the potential to save money compared to professional renovations or store-bought items, makes DIY kitchen decor an incredibly appealing option for many. The trend also reflects a broader desire for sustainability and individuality, as people move away from generic, mass-produced items and embrace unique, handcrafted elements.
Benefits of DIY Kitchen Decor
The benefits of DIY kitchen decor extend far beyond aesthetics and cost savings. Firstly, it fosters creativity and allows you to express your personal style in a tangible way. You’re not limited by the constraints of pre-designed products, so you can tailor every element to your preferences. Secondly, DIY projects can be remarkably budget-friendly. By repurposing materials, shopping at thrift stores, or simply doing the labor yourself, you can significantly reduce expenses. Furthermore, DIY projects are incredibly rewarding. The sense of accomplishment that comes with completing a project, knowing that you’ve transformed your space with your own two hands, is unparalleled. Lastly, DIY allows you to learn new skills and expand your knowledge of home improvement and design. These skills can be invaluable for future projects and boost your confidence in tackling new challenges.
Top 7 DIY Kitchen Decor Finds

Here are seven inspiring DIY kitchen decor finds to transform your space, inspired by the wealth of ideas available on platforms like Pinterest. These projects range in difficulty and cost, catering to various skill levels and budgets. From simple updates to more involved renovations, you’ll find something to spark your creativity and personalize your kitchen. Each idea offers a unique opportunity to enhance the functionality and aesthetic appeal of your kitchen, making it a more enjoyable and inviting space to cook, entertain, and spend time.
Open Shelving Ideas
Open shelving is a fantastic way to modernize your kitchen and showcase your favorite dishware, cookbooks, and decorative items. DIY open shelving projects can range from simple floating shelves made from reclaimed wood to more elaborate designs with brackets and supports. The key is to consider the weight capacity of your shelves and choose appropriate materials. For a rustic look, consider using reclaimed wood and metal brackets. If you prefer a more minimalist aesthetic, opt for sleek, floating shelves with hidden supports. Organizing your shelves thoughtfully is essential; group items by color, style, or function to create a visually appealing display. Incorporate plants, artwork, and other decorative elements to add personality to your open shelves.
Floating Shelves DIY Guide
Creating your own floating shelves is a relatively straightforward DIY project. Start by measuring the space where you want to install the shelves and cutting your wood to the appropriate length. Choose sturdy wood like pine or oak for durability. Next, install shelf supports or hidden brackets onto the wall. Ensure the supports are level and securely fastened to the wall studs. If you are using hidden brackets, attach them to the underside of the shelf and then slide the shelf onto the supports. Consider adding a finish to the shelves to protect them and enhance their appearance. Staining or painting the wood can complement your kitchen’s overall design. Finally, carefully place your items on the shelves, arranging them in an aesthetically pleasing way, and enjoy your newly created, functional, and stylish kitchen storage.
Backsplash Makeover Hacks

A backsplash can significantly impact the look of your kitchen, and there are numerous DIY-friendly ways to update it without a complete renovation. One popular option is to use peel-and-stick tiles, which are easy to install and come in various styles and materials. Another option is to paint your existing backsplash, using a durable, moisture-resistant paint and stencils to create unique patterns. For a more textured look, consider using beadboard or shiplap. Before starting any backsplash project, thoroughly clean and prepare the surface. Measure carefully and plan your layout to ensure a professional-looking result. Don’t be afraid to get creative with your design, incorporating different colors, patterns, and textures to reflect your personal style and upgrade your space on a budget.
Stenciled Backsplashes
Stenciling is a fun and affordable way to add visual interest to your backsplash. Begin by cleaning and preparing your existing backsplash surface, whether it is tile, laminate, or painted drywall. Choose a stencil design that complements your kitchen’s aesthetic, from geometric patterns to intricate floral motifs. Secure the stencil to the wall using painter’s tape to prevent movement. Use a stencil brush or a small foam roller to apply the paint, working in thin, even coats. Be patient and allow each coat to dry before applying the next. Once the paint is dry, carefully remove the stencil to reveal the pattern. Seal the stencil with a sealant suitable for kitchens to protect it from moisture and ensure its longevity. Experiment with different color combinations to achieve the desired effect and a customized backsplash.
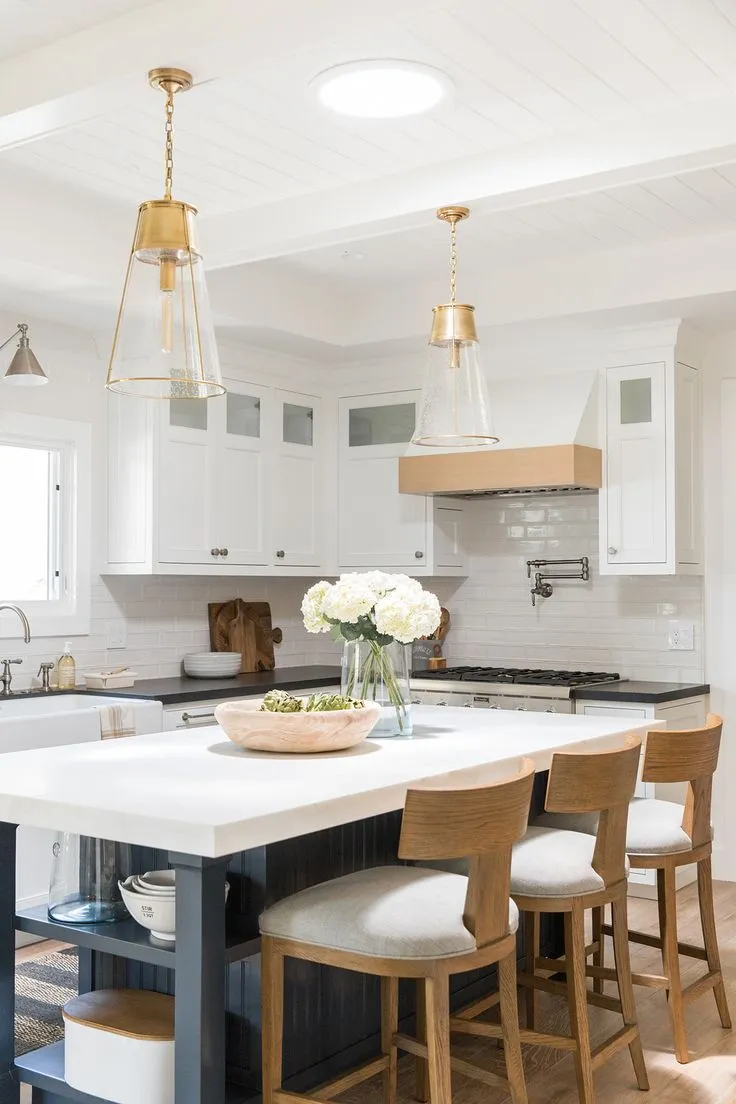
Creative Kitchen Lighting
Lighting can dramatically transform the ambiance and functionality of your kitchen. DIY kitchen lighting projects can range from simple pendant light upgrades to more elaborate installations. Consider replacing outdated light fixtures with stylish new options, such as pendant lights over your island or dining area. Add under-cabinet lighting to illuminate countertops and provide task lighting for food preparation. Use smart bulbs to control your lighting remotely and adjust the color temperature to create the perfect mood. When selecting lighting, consider the overall style of your kitchen and choose fixtures that complement your décor. Experiment with different types of lighting – ambient, task, and accent – to create a well-lit and visually appealing kitchen space. Good lighting is essential for both functionality and aesthetics, so do not be afraid to get creative.
DIY Pendant Lights

Creating your own pendant lights allows for customization and personalization. Repurpose vintage items like mason jars or old teacups as shades. You can find pendant light kits at most hardware stores, including the wiring, sockets, and mounting hardware. Decide on the placement of the pendant lights and mark the ceiling accordingly. Assemble the pendant lights according to the kit’s instructions. Install the mounting hardware and connect the wires to the existing electrical wiring. Ensure the lights are properly grounded. Install the light bulbs and test the lights before enjoying your new custom pendants. These are great ways to add a unique and stylish touch to your kitchen and are a great option for diy kitchen decor.
Personalized Kitchen Accessories
Small details can make a big difference when it comes to kitchen décor. DIY kitchen accessories are easy to personalize and add a touch of personality. Consider painting or stenciling wooden cutting boards to match your kitchen’s color scheme. Create custom storage solutions, such as spice racks or utensil holders, using reclaimed wood or other materials. Make decorative items, such as painted canisters or framed artwork, to brighten up the kitchen. Choose colors and patterns that reflect your style and add visual interest. Personalized accessories are a fantastic way to enhance your space and make your kitchen truly your own. Look on platforms like Pinterest to create a cohesive and stylish design. These types of projects add the final touches to your kitchen.
DIY Painted Canisters
Transform plain canisters into stylish kitchen decor with paint. Thoroughly clean and prepare the canisters for painting, whether glass, metal, or ceramic. Choose a paint that’s suitable for the material of your canisters. For a sleek look, use chalk paint, or consider acrylic or enamel paint. Apply multiple thin coats of paint, allowing each coat to dry before applying the next. Add stencils, decals, or hand-painted designs to personalize your canisters further. Seal the painted canisters with a sealant to protect the paint from scratches and moisture. Use these canisters for storing dry goods like flour, sugar, coffee, and tea, or for organizing small kitchen tools and utensils. DIY painted canisters are a great option for diy kitchen decor.
DIY Kitchen Herb Garden

Bring the freshness of the outdoors into your kitchen with a DIY herb garden. Choose a sunny location, such as a windowsill or a countertop near a window, for your garden. Select herbs that you use frequently in your cooking, such as basil, rosemary, mint, and chives. Plant the herbs in individual pots or a decorative planter. Use a high-quality potting mix to ensure proper drainage and nutrient delivery. Water your herbs regularly and provide adequate sunlight. A DIY herb garden is not only a great way to have fresh herbs on hand but also adds a touch of greenery and natural beauty to your kitchen decor. This is a great option for diy kitchen decor and can be an easy project for beginners.